Magento 2.3 was released on 28/11/2018. The most concerning feature of this huge upgrade is Magento inventory management and specifically Magento MSI (or Magento 2 MSI, Magento Multi-Source Inventory).
Now:
We are indeed a ‘bit’ late to introduce this.
But we commit to making a complete guide to help you.
So, let’s take SmartOSC a look at the core of Magento Multi-Source Inventory and discover its functionality in Magento 2.
What is Magento multi-source inventory?
Magento Multi-Source Inventory, in short MSI, allows a merchant to manage all inventory sources without any third-party extensions or platforms.
With Magento MSI, it’s possible to link multiple inventory sources to one or multiple websites.
The amount in which a product is available is calculated based on the sources made available for that website.
Grouping multiple sources and defining the relationship between sources and web stores are done with a new concept: “stocks”.
As if that’s not enough:
We have a new term – salable quantity. The Salable quantity is the total sum of the stocks, which updates immediately when a sale is processed.
►►►► Please visit our products: Magento POS, BigCommerce POS, Shopify POS, Woocommerce POS, NetSuite POS, Mobile POS, White label POS, Reseller POS, POS System for Retail and Commercetools POS
Also, we have source selection algorithms, to deduct the source of a product right after a shipment is created.
We will talk in more detail about these things thoroughly later.
See more articles: Sitecore Agency
Magento multi-source inventory features
To understand the concept of this new functionality, you should read the Magento MSI’s Features, then highlight and remember some new terms of features.
Magento inventory Sources
Magento MSI is based on the “sources”.
A source is actually “a physical location of a stock”, or a place where products are stored.
It can be a warehouse, a brick-and-mortar store, distribution centers, drop shippers, your home, or everywhere.
Quick note:
Sources are physical locations, and any location with available stock and capable of order fulfillment can be added as a source.
So if you are selling products from multi-location (of course, that’s why you search for Magento MSI), you need to create sources for each inventory location.
To create new sources, you can do as below.
Step 1 On the Admin sidebar, tap Stores. Then under Inventory, choose Sources.
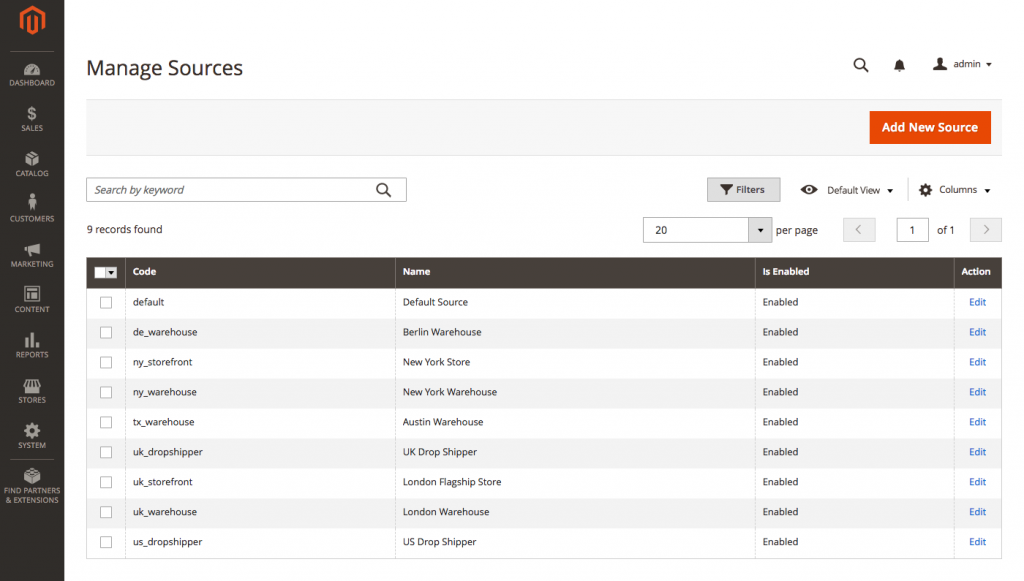
Step 2 Now Add New Source.
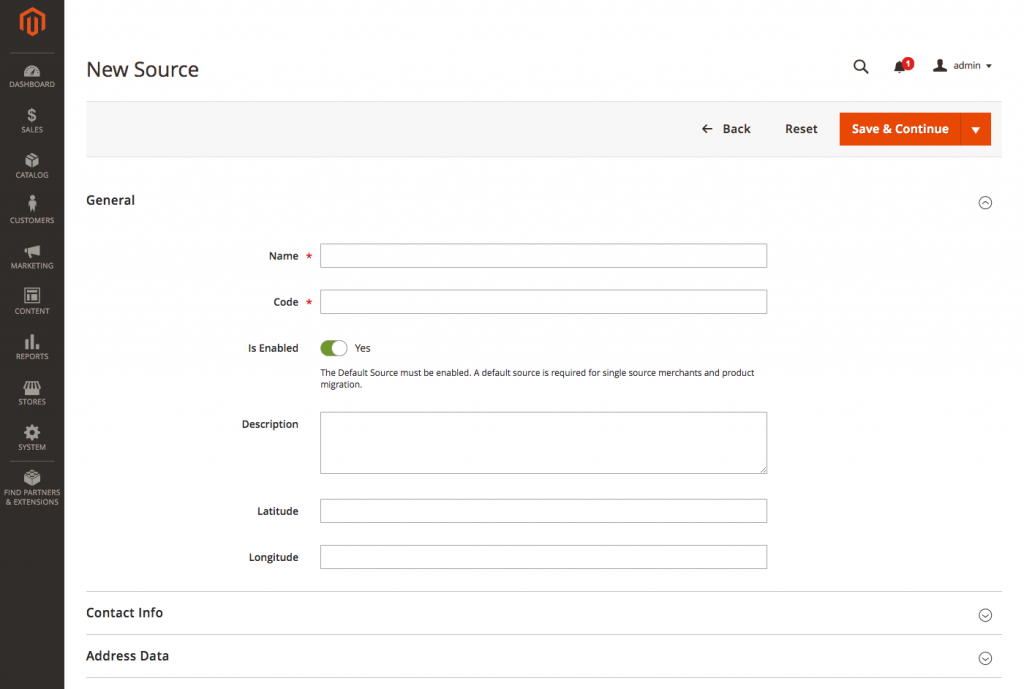
Step 3 Input the General information like Name, Code.
You should select Enable if this source will fulfill orders as soon as products are assigned.
The source must have assigned stock for one or more websites. The Default Source cannot be disabled.
Other fields like Description, Latitude, and Longitude are all optional.
Step 4 Complete the Contact Info for a primary contact at the location.
- Add the Contact Name of the primary contact.
- Add the Email address of the primary contact.
- In the Phone field, add the area code and phone number of the primary contact.
- In the Fax field, add the area code and phone number of the fax if available.

Step 5 Finish the Address Data for the location.
You must finish the required fields, Country, and Postcode. Other fields, State/Province, City, and Street are all optional.

Step 6 Save.
Sources may not be deleted to ensure all order data retains in Magento. Sources, orders, and shipments are directly connected.
You can disable sources and modify the information including location and point of contact.
When you disable a source, these things will happen:
- MSI ignores and does not list the source for shipment or order processing
- Stocks do not access inventory quantities from the source for aggregated inventory totals
- Order shipments cannot be assigned to disabled locations.
If you keep the status of the source to be enabled, you can edit and update the information like the point of contact, physical address, or Longitude and Latitude.
Just one note, you can’t change the Code of the source.
See more articles: Magento Agency
Magento inventory stocks
As we stated above, the term “stocks” is used to group multiple sources.
Stocks map your sources to sales channels, providing a direct link to salable quantities and inventories.
While sources are actual physical locations, the stocks are the virtual representation for multiple sources.
To add Stock, again, you need to do as below.
Step 1 On the Admin sidebar, tap Stores. Then under Inventory, choose Stocks.
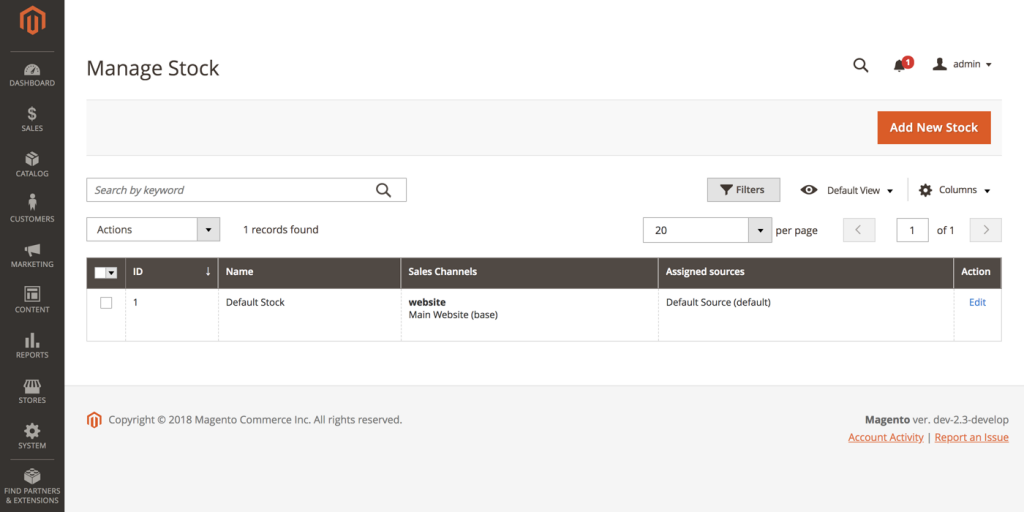
Step 2 Now Add New Stock.
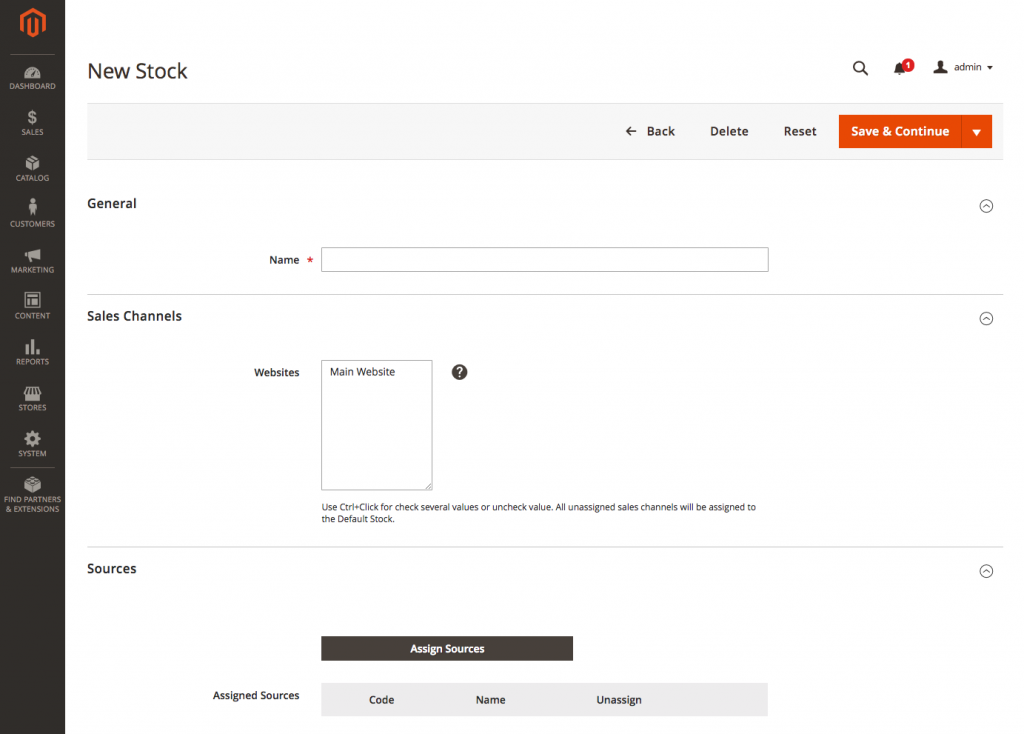
Step 3 You must add a unique Name for your Stock. Other than that, in Sales Channels, you can assign the stock to one or more listed sales channels. The sales channel is (mostly) your Magento views.
Step 4 Then Assign Sources. Choose the sources you want to apply to the new stock. Then, click Done.
Step 5 Save.
The main difference between Sources and Stocks is that Stocks can be deleted.
Note that:
Stocks can’t be disabled, however, any sales channels and sources can be reassigned as needed.
If you don’t want to delete a Stock, you can choose to edit it.
You can change everything, from the Name, the sales channels, and the assigned sources.
But remember that you can only do it with New Stocks, not the Default Stock.
Also, if you unassign a sales channel without adding it to another custom stock, it will be assigned to the Default Stock.
Magento Inventory Salable Quantity
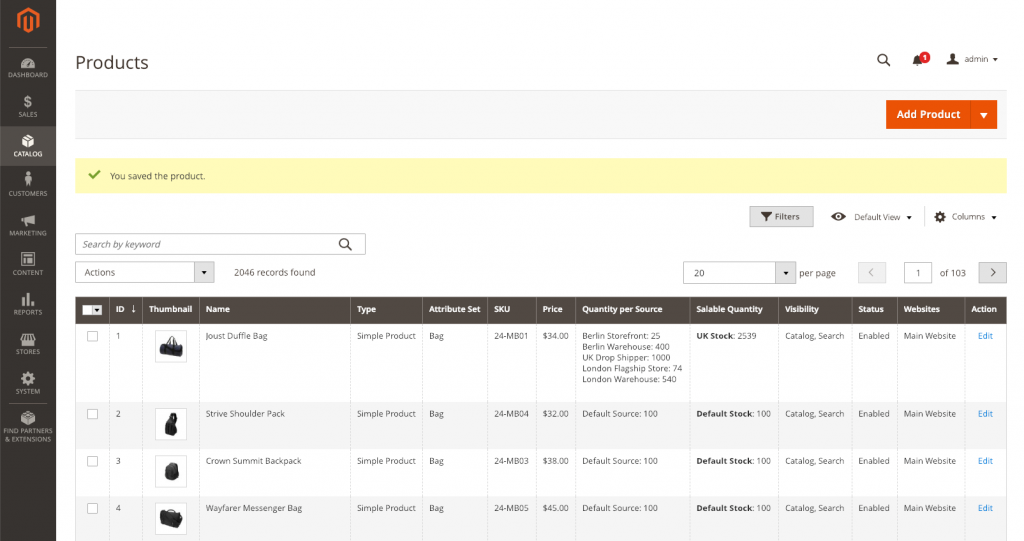
Magento MSI introduces a Salable Quantity displayed through the Product grid.
You have Sourced, you have Stock, now you after creating sources and stocks you need to distribute the products.
The value displays in a column next to Quantity per product for Multi-Source merchants.
The amount is an aggregated total of product inventory available for purchase for a stock.
Magento MSI Related Products
Magento 2.3 with MSI features opens new opportunities for a lot of Magento Technology Partners to develop integrated functions.
Merchants confidently take advantage of that built-in function and explore enhanced features.
1, Magento POS integrated with MSI – The perfect online to offline solution for Magento merchants.
Magestore Magento point of sale is an all-in-one POS system.
It allows users to log in to POS Checkout from one URL.
All you need is a browser and not even the internet because it comes with offline mode.
With native integration with MSI, inventory is synced in real-time between Magento web POS and the Magento 2.3 backend.
POS functions as a second Sales Channel next to the Online Sales Channel (Magento Site).
It connects to the data of MSI and displays the inventory from the associated stock.
Any order created on the POS will be updated to the Magento backend in Real-time.

2, Advanced MSI
Amasty develops a plugin that extends the functionality of MSI.
It gives the merchants flexibility to have various physical and virtual stocks, with complex logistics.
Advanced MSI extension will allow you to manage all this within one Magento, picking warehouses based on the nearest location, stock availability, or priority.
Moreover, there is a cutting-edge algorithm: combining all the picking options suggests the optimal variant.
Plus you can link your websites to particular stocks.
Conclusion
There you have it, a complete guide of how to manage your inventory in Magento 2 using MSI.
I hope you already get an idea of what are the steps to successfully set up the configuration.
If you know of any other modules enhancing the function of MSI, please do leave a comment below.
Or if you require more information on how to set this up for your store. Do not hesitate to get a free consultation with us by clicking the link below.
Article source: Magento VietNam
►►►► Our related services: low code platforms, cloud networking, adobe marketing cloud, IT jobs in Vietnam, partner strategy for ai, digital customer experience strategy, digital transformation, core banking platforms, agentic ai companies, phần mềm quản lý doanh nghiêp, nền tảng quản trị doanh nghiệp, phần mềm nhân sự, phần mềm chấm công, phần mềm tính lương, phần mềm KPI, phần mềm OKR, Phần mềm quản lý dự án, App chấm công, Cách tính lương, Ftrip Viet Nam, vietnam itinerary 2 weeks, north vietnam 2 week itinerary, northern vietnam 2 week itinerary, vietnam luxury tours, custom travel itinerary, best tour operators in vietnam, Vietnam Photography Tour, Photography Tour Guide Viet Nam

